Showing posts with label step by step. Show all posts

Wednesday, January 15, 2014

Navy Smoke EOTD with Copper and Rose Compliments


This look was inspired by a look I've seen a number of times, typically on women with dark skin. Gayle King was a guest judge on the season finale of Project Runway Allstars which aired last week and had a deep blue matte smoky eye and it inspired me to take a look to see if I had the colours in order to try it out on myself. 

Turns out I don't have a matte deep blue/navy blue to work with but I have some shimmery deep blues and I tried them out. 

This is what I came up with and I like it! It's a great take on the smoky eye and this look would work well on most skintones, particularly on darker skintones and with brown eyes (the navy is a perfect contrast for brown eyes). 

This look looks a lot darker and less shimmery in person than it photographs. The flash obviously picks up the shimmer in the eyeshadow. I'd love to try this using matte eyeshadows. 


I used this Lisa Eldridge video as inspiration, though I didn't use the same products. 


The products I did use are:
  • Calvin Klein Tempting Glance Intense Eyeshadow in Midnight Blue (shimmery navy blue)
  • Sleek Makeup Ultra Matte Eyeshadow in Ink (matte deep sapphire blue)
  • MAC Frost Eyeshadow in Deep Truth (shimmery true dark blue)
  • Bloom Eye Definer in Black 
  • L'Oreal Voluminous Mascara in Black


1. I started by pressing Midnight Blue onto my eyelid with an eyeshadow brush. Since I wasn't getting good pigmentation from it so I added some Ink to it, focusing on my eyelid. I wanted a dark blue, as dark as I could get so I layered and layered. I'll try this look again but using Ink instead of Midnight Blue, which I think is too old and dried out to use, though the shimmer of it nice for this look.

2. With a clean eyeshadow brush, I blended out the edges, making sure I had some shadow slightly above my eye crease. Blending is the key to wearing dark colours and for doing a smoky eye. You have to make sure there are no harsh edges. So blend and add and blend some more until you get the look you want - darker on the lid and towards the lashline and softening at the crease and above. 

3. Once I had the shape and effect I wanted, I used black eyeliner to line my waterline, working it into my lashline and smudging it slightly above. This step is key to a smoky eye look. If your eyes are particularly sensitive or tend to water, look for a pencil designed for sensitive eyes or a water-resistant version. 

4. To add a touch of brightness, I used an eyeshadow brush to apply a bit of Deep Truth to my crease about 1/3 from the inside corner of my eye. I also dabbed it to my lower inner eye. It's subtle but adds a brightness to the look.

5. I curled my lashes using my Shu Uemera eyelash curler and applied three coats of L'Oreal Voluminous Mascara in Black.

6. To compliment it, I filled in my brows with a bit of MAC Wedge (muted matte beige taupe) and Embark (matte reddish brown) eyeshadows and because blue and orange compliment each other, swept MAC Mineralize Blush in Warmth of Coral (coral-peach) along my cheekbones using an angled blush brush. On top of my cheekbones, to highlight, I swirled a little bit of MAC Extra Dimension Skinfinish in Superb (soft peach nude with multidimensional shimmer).

7. I wanted to keep my lips muted but softly enhanced, so I applied MAC Lipglass in Full For You. It's a MLBB gloss for me and one of the few lipglosses I wear (I'm much more a lipstick girl than a gloss girl). It adds a subtle rosy colour and of course, shine.

8. My base is my usual Sleek BB Cream with OCC concealer under my eyes and on red spots, but I used a dusting of MAC Studio Fix on my t-zone to give me a mattified look rather than my usual loose powder.


Overall, I quite liked this look. It wasn't quite what I was aiming for, but without a deep matte navy blue in my makeup collection, I wasn't going to achieve it. Still, this is a very wearable, fun, flattering, edgy blue-purple smoky eye that reminds me of the makeup looks I used to wear when I was younger. I never used to go out at night without a smoky eye. 

You could do this look with shades of brown or grey if you wanted a more traditional smoky eye. Or try it with purple or green or burgundy. 

Blues on the eyes are fantastic for making brown eyes pop. So take note, brown-eyed guys and gals!

Black liner in the waterline makes all eye colours pop. Without it, this look on me might not be so flattering. The blue of the shadow would overpower the blue of my eyes without the black liner. 

It's a very simple look. I used three different eyeshadow colours, but could've gotten away with just two - the dark blue and the brighter blue as highlight. And a black eyeliner pencil, that's it. This look is all about the blending. It should look soft, with no harsh lines. 


What's your favourite colour to do a smoky eye with?

C.

Thursday, September 19, 2013

Simple FOTD with Full Brows and Red Lips


I thought I might share with you the makeup I've been wearing almost every day lately. The temperatures have dropped lately and it feels like fall, finally, so that means we can pull out our red and plum lip colours. Another thing that tends to become in fashion in fall is fuller brows. Partly I think this is due to the fact that with cooler temperatures, makeup isn't prone to melting off the skin as much and we can get away with wearing a bit more.

This look was inspired by a few makeup tutorials I watched about fuller brows and Cara Delevingne, the latest supermodel de jour/It Girl. Cara rocks a tomboy look, and has naturally dark, full brows which contrast perfectly with her blonde hair. Everyone is clamouring to mimic her.

Me wearing this look lately is also due to the fact that I'm taking a break from wearing my contact lenses. It's been an adjustment to wear my glasses every day, especially when it comes to wearing makeup. My prescription is high and I'm very near sighted, so my glasses make my eyes look smaller. It's tempting to wear dark make-up on my eyes to make them stand out behind my glasses but that can make them look smaller. It's also pretty tough to get a decent liquid liner flick (my usual daily eye look) due to my poor vision. I also don't feel as cute when I'm wearing my glasses, so I don't want to get lazy and give up my regular makeup routine, and I want to do something that makes me feel cute despite the glasses.

So that means focusing on my eyebrows, lips and cheeks!


This look is very, very simple. My base is some primer (Benefit Porefessional) on my nose, beside my nose, my chin and forehead, Urban Decay's Eye Primer on my eyelids, and a BB cream (Garnier) mixed with a bit of liquid concealer (Vasanti) for the redder areas. I used a heavier cream concealer (OCC) to cover up the dark circles under my eyes and powdered with Pari's Mineral Glow to set where needed on my T-zone and under my eyes. 

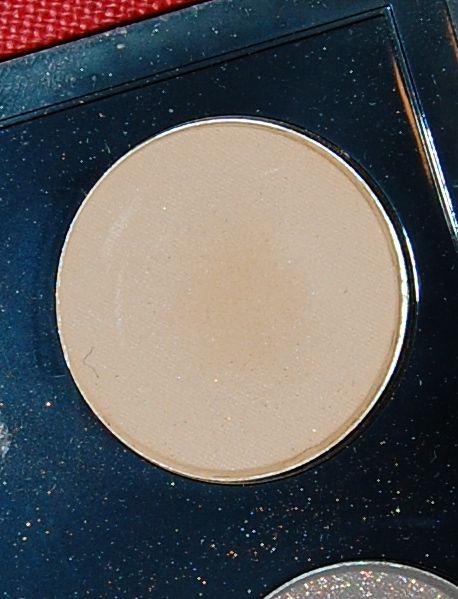
I used two eyeshadows to fill in my brows and used the same shadows on my eyes - MAC Embark and MAC Wedge (pictured below). Embark is a warm brown-red and Wedge is neutral beigey shade. First, I combed my brows up using a clean mascara wand, and then, using a small, dense angle brush, I filled in my brows with Embark, working in short, soft strokes and sticking pretty close to the natural shape of my brows, but going slightly above and below to thicken them. I combed through my brows periodically to soften the colour and make sure they weren't looking too solid. 

I then went through the same brush and a little bit of Wedge, just to lighten my brows slightly. I also used Wedge on top of Embark where it was above and below my brows, to soften the shade. I wanted it to look as natural as possible, so I brushed through my brows frequently as well.

Finally, I set them using a clear brow gel (Anastasia), combing my brow hairs up while applying. Did you know you can use a clear mascara as a brow gel? Save yourself some cash!


I used a fluffy crease brush (Real Techniques) to apply Wedge (it makes a fantastic crease colour) to my crease, focusing on the outer corner and pulling it towards the nose oh-so-slightly. I also applied Wedge below my eyes, for a slight shadowy effect. 


With an angle brush, I smudged Embark along my upper lash line, flicking it slightly out at the corner and smudging the line slightly for a smoky effect. It's a VERY subtle, soft eye look, barely there. 

I curled my lashes using my Shu Uemera eyelash curler and applied L'Oreal Voluminous Mascara in Black. This mascara is quite natural, despite the name and it's easy to apply just a little without making it look heavy and thick. 


On my cheeks, I applied MAC's Mineralize Blush in Warmth of Coral softly at the outer edges of my cheeks with a fluffy blush, sweeping it in towards my nose, slightly. I wanted a hint of colour, and definition, so I also used a denser blush brush to apply the colour along the contour line of my cheek. 


Finally, I applied MAC's Absolute Power directly from the tube only my lips. It was a limited edition shade that Jill accidentally bought two of so I got one. It looks a heck of a lot more purple and deep in the tube, but on, it's a spectacular red. It stains a lot, which I kind of like because when it's gone, you're not bare-lipped. No makeup-makeup!

This look can be worn without a dramatic lip colour, of course. And I do for day. I just increase my blush and use a pretty rose colour on my lips, such as MAC's Gem of Roses. 

And here's the look with my glasses on. I like that this look defines my eyes, brows and cheeks slightly, in a way that doesn't have them competing for the spotlight. And I can't get enough of this gorgeous, gorgeous red lipstick!


Products used (base products not pictured):.
Top Row L-R: MAC Embark eyeshadow, MAC Wedge eyeshadow, MAC Mineralize Blush in Warmth of Coral
Below: L'Oreal Voluminous Mascara, Anastasia Brow Gel (sample size), MAC Absolute Power lipstick


So there you have my current, cooler-weather, Cara Delevingne-inspired FOTD. Let me know what you think in the comments! What's your cooler-weather look? 

C.

Monday, April 8, 2013

FOTD: 1960s, Mod and Twiggy

When did I flashback to the 60s?


Mad Men's season 6 premiered last night and with Don Draper and his advertising gang and their cohorts well into the groovy, colourful, political 1960s, I thought I'd do a 60s-inspired FOTD in honour of my favourite style and culture decade.

My muse was Twiggy, that doe-eyed, pixie-cut, English supermodel whose gamine look became the style hallmark of the decade. 


Twiggy's look was all about the eyes. The larger the better, with false eyelashes, painted-on lower lashes and an exaggerated crease line. This made the eyes look doll-like and gave her an enhanced look of innocence. 

The preview photos I've seen for the new season of Mad Men show the female characters with distinctly 60s eye makeup, particularly young and stylish Megan (Jessica ParĂ©) and newly single and new ad agency partner Joan (Christina Hendricks). 

I should also mention that fashion designer Lily Pullitzer passed away yesterday and I have one of her dresses. It's a very 60s A-line style shift dress in navy with pink embroidered circles all over it. I thought it'd be apropos to wear it while being having my makeup photographed. You can see a little of it in the shots below.

This look was fairly simple and quick to do. I used no liquid eyeliner which helped to lighten the eye look, but you can feel free to add a line of liquid liner across the top lashline when you recreate this on yourself - because you totally want to, right?


Megalashes, right? I felt like Bambi when I blinked. 


Super subtle crease contour!


How to get the look:

1. If you have oily skin or plan to wear this look for a long time, apply a primer to your skin. Use an eye primer on your lids. 

2. Apply a natural-looking base. Twiggy's skin was always very natural. I used a BB cream, concealer under my eyes and on any red areas and powdered to set.

3. With an eyeshadow brush, apply a very pale cream eyeshadow to your lids, focusing on the lid and on the browbone. I used MAC Paint Pot in Bare Study. The 60s look used a matte white but you can use something with a bit of shimmer and more beige, as I did. The cream colour acts as a base. 

MAC Paint Pot in Bare Study
4. With a clean eyeshadow brush, apply a light champagne-white power eyeshadow to your lids and browbone, on top of the cream colour. I used a combination of MAC Phloof! and MAC White Frost (more of the former, a touch of the latter). Don't be afraid to go a little heavy. You want your eye area to be very light-coloured. Also run the brush along your lower lashline, completely encircling your eye with the light colour. 

MAC Phloof! and MAC White Frost
5. With a tapered crease brush, apply a warm, soft matte beige colour to your crease, very softly. This step is to create a line for your dark colour to follow. Blend to soften and reapply as needed for a soft shadow line. The crease line will be from the inside of your eye to the outside of your eye. I used this shade below, MAC Wild By Heart. You can see the beige line in the close-up photos of my eyes above.


MAC Wild By Nature
5. With an angle brush (MAC's 266 is good) apply a thin line with a matte dark grey or black shadow, following the beige line you just drew. I used a combination of this purpley-grey (MAC To the Ball) and MAC Nehru (a bluish black). Go slowly and carefully with this step as you want to draw as perfect and as thin a line as possible. 

MAC To the Ball

MAC Nehru
 6. With the same brush you used to apply the beige line, blend out the darker line, very softly. You want the line to be distinct. This isn't a subtle crease shadow. Go back with the angle brush if you need to and blend again, if you need to.

7. With the angle brush, smudge the same dark shadow along your lashline. If you'd like to use a liquid liner, this is where you'd apply it. 

8. Curl your lashes. 

9. Apply false lashes to your top lids and lower-lash false lashes to your lower lids. I used MAC lashes but I don't know what they're called as there's no number on either of these. If you get a full-set of dramatic lashes for the top and a piecey set like those pictured below for your lower lashes, you'll be just fine. I used Duo lash glue to apply them. Twiggy used to paint on her lower lashes, so if you want to try that, go right ahead! And if you'd like to use more dramatic lashes than I did, feel free to as well.


False lashes - top

False lashes - lower
10. Apply black mascara to your top and bottom lashes. This is simply to blend your lashes with the falsies. My lashes are almost blonde, so it helps for me to apply mascara to hide them. Apply more dark shadow to your top lashline, if needed.

11. Use a white or skin-tone eyeliner pencil to line your waterline. In the photos of Twiggy above you can see she did this all the time. It enhances the whites of your eyes and makes them look bigger. I used Benefit Eye Bright.

12. My brows are quite a bit thicker and darker than Twiggy's were and they don't suit this look, which is all about the eyes. All I did was comb through some of the Benefit Eye Bright to try to make them look lighter in colour. If your brows are light, simply comb them and apply some brow gel as needed. If they're dark you may want to lighten them by applying a light eyebrow pencil or eyeliner to them.

13. Apply a very natural neutral pink-beige blush to your cheeks, very sparingly. Twiggy's skin was always very natural, so this step is only as needed. The focus is all on the eyes in this look. I used MAC's The Perfect Cheek and a large, fluffy brush brush to apply it just to my cheekbones. Just a whisper of colour was needed as I'm quite fair.

MAC The Perfect Cheek
14. Lip colour. Use a creamy peachy or pinky shade. Use a lip pencil if you need to or apply concealer to your lips to completely cancel out their natural colour. You want the lips to almost disappear, so the eyes can be the focus. I used OCC Lip Tar in Hush on top of a concealer.

OCC Lip Tar in Hush

Groovy, baby!


Wednesday, February 6, 2013

Beauty Squared Beauty Lessons: The Perfect Red Lip

A reader asked us to do a post about red lips - what products and tools to use and the steps to achieving the perfect red lip. 

In this post we'll look at the products you'll need, including the lip colours, and what you'll need to do to wear a red lip. No major sacrifices, we promise, but the red lip is a powerful thing and must not be worn casually (OK, maybe once and a while it can be). This lesson will focus on doing a classic red lip like Marilyn Monroe or Dita von Teese. 

What you'll need:
  • the lipstick (see Step one)
  • a lipliner that matches your lipstick
  • a clean, dry toothbrush
  • Kleenex
  • a rich, moisturizing lip balm
  • a lip brush
Step one: Choose your product. 


You'll want to choose a matte lipstick in a bold true red, like MAC's Ruby Woo (widely known in the beauty world as a universally flattering red). If Ruby Woo is not for you, check out NARS' Dragon Girl or MAC's Russian Red. 

Step two: Prep your lips. 

Wash your face and prep with moisturizer. Using a clean, dry toothbrush gently exfoliate your lips in a circular motion. The skin on your lips is thin so be gentle. This step will remove any dry, dead skin.


After exfoliating, apply a rich, creamy lip balm. It will absorb into your freshly scrubbed lips and provide a smooth surface for your lipstick application later. Moisturizing your lips before applying lipstick will also help to keep your lips from drying out.

Step three: Perfect your skin. 

You'll want to have the most perfect skin you can possibly achieve if you want to pull off this kind of lip look. If your skin is good on its own, lucky you! Otherwise, foundation, concealer and powder need to be applied. Take the photo of Dita above as your inspiration as well as this one of Marilyn Monroe.


You want an even-toned, well powdered (but not powdery) complexion. Keep the rest of your look simple and neutral but polished - a bit of eyeliner, some false lashes (if you like), neutral eyeshadow, some light blush or bronzer, and well-groomed brows.

*My favourite way to wear a red lipstick in this classic style is with a line of liquid eyeliner, flicked out at the end, a neutral matte eyeshadow that matches my skin tone but brightens it (IE. MAC Brule) on the lid, a neutral matte crease colour like MAC Wedge, and a soft highlight on the brow (IE. MAC Shroom).  Maybe a little bit of Wedge underneath the eye. Lots of mascara and maybe some false lashes. I'll use a soft, warm blush to softly contour my cheeks and temples or add a soft pink to my apples, very, very lightly. I'll shape my brows into the classic 50s shape (slightly squared off at the start and gracefully arched and elongated).

Step four: 

Line your lips. First blot your lips to remove any excess lip balm. Any excess will make your lips slippery and your liner and lipstick will have trouble adhering. Messy! With a sharpened lip liner line the outside of your lips carefully. The best way to do this is is to smile with your lips closed to draw the skin of your lips as taut as possible. Follow your natural lip line and if your lips aren't naturally even, make adjustments as needed with the liner. Check your work in the mirror to ensure that you've drawn an even line all the way around your lips.


Use a Q-tip to erase any mistakes. Sharpen the pencil if you need to. With a Q-tip soften the edges of your lips if they appear too harsh or if you've drawn outside the lines.


Once you've got the shape you want, fill in your entire lip area with the liner. This will ensure that when your lipstick wears off you won't be left with an outline of red around the outside of your lips.


Step five: Apply lipstick. 

Using a lip brush is very important when you're applying a bright, dark or bold colour. It allows you to have a lot of control over where you apply product and where you don't. You want a small, flat lip brush for this.


Take a small amount of lipstick onto the brush. Start with a little because you want to have as much control as possible applying it. You can add as you need to. Where you start applying is up to you - but it may be easier to go along the outside of your lips and work in. In the centre you can be a little less cautious with your application but make sure to go slowly around the edges. 


Step six: Blot and powder. 

When you've got a layer of lipstick on, you'll want to blot. This has the same effect as blotting the excess lip balm off before applying lipliner. It'll remove excess lipstick and leave more of a stain behind which will make your lipstick last longer. 

To do this, separate a piece of Kleenex into two layers. Press one of these layers onto your lips. Using a brush that's been dipped in powder or a powder puff with powder on it, press powder lightly onto the tissue. A small amount of powder will transfer through the tissue onto your lips but not enough to change the texture or colour. This will make your lipstick last longer. 


Step seven: Apply lipstick. 

Apply another layer of lipstick on top of the blotted and powdered layer. 

Step eight: Blot. 

Using the second layer of tissue, blot your lips again by pressing them against the tissue. 
 
You're done! You should now have your completed, perfect red lip that will last and last. 


*Note: I used a photo of my full face even though I'm only wearing foundation, concealer and powder (no mascara, eyeshadow, brow colour or blush) apart from the red lipstick, to show how I could possibly go out just like this. The red has that much of an impact and it shows how keeping the rest of the face simple (even this simple) is so important. 

There are other ways to wear a red lip, aside from the look detailed in the steps above. You could use the same lipstick and tap it lightly onto your lips using your finger to create a stained effect. You could top it with a gloss to make a high-shine red lip. You could use a sheer red lipstick for an everyday red lip with clean skin.

One of my favourite ways to wear a red lip is with clean skin, a bit of soft gold eyeshadow, a tiny bit of blush, strong brows and lots of mascara. In the photo below, my red lips are NARS Dragon Girl Velvet Matte Lip Pencil. It's a simple, glam look without looking too done.


For some more red lip looks, please check out the posts here and here.


A red lip is not the easiest makeup look to achieve, but it's definitely worth mastering. If you have any questions, please ask in the comments below!